Introduction
This is a step-by-step tutorial on how to build a simple phone application for a business using Telekit’s platform.
Objective
The objective is to create a functioning application that is linked to a business phone number. By calling into that business phone number, you can experience the call flow from a customer perspective.
Scenario
Let’s assume you are the owner of the Lakeview Cafe. You have two locations: Chicago and Detroit. You also sell coffee beans wholesale. Let’s build a Telekit application for your business.
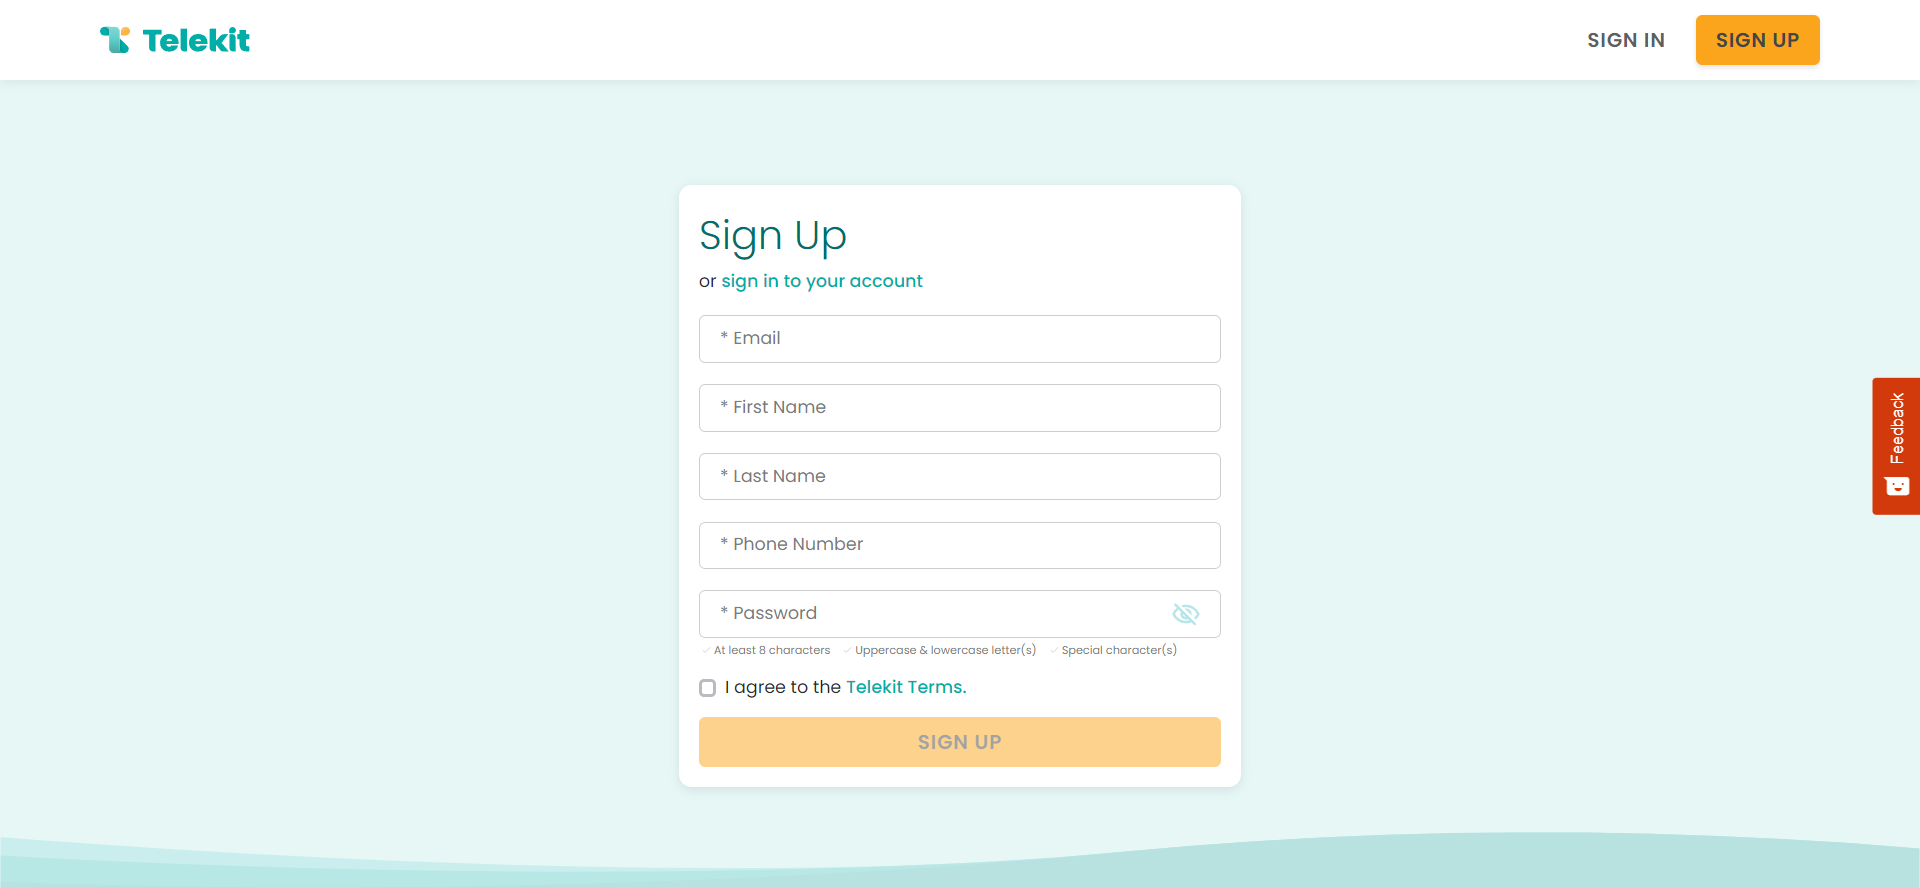
1. Sign up on Telekit
Enter your email, name, phone number and password in the sign up form. You will be required to verify your email and phone number.
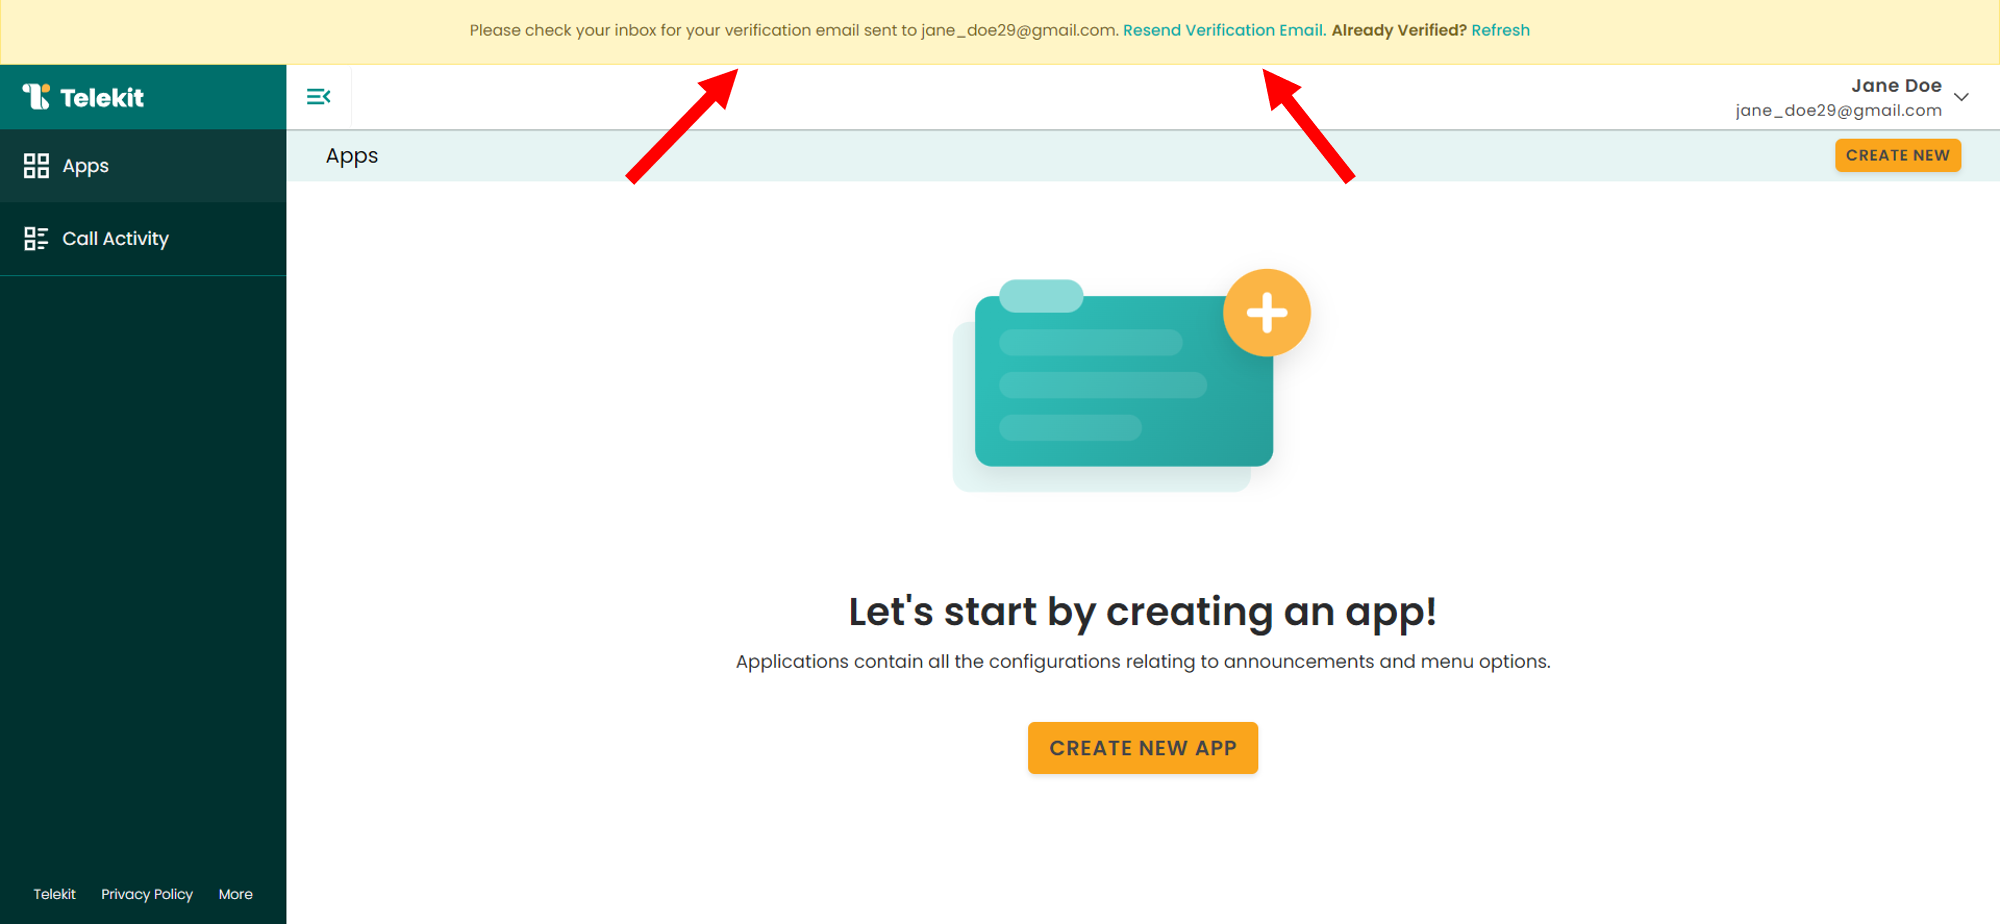
2. Verify your email address
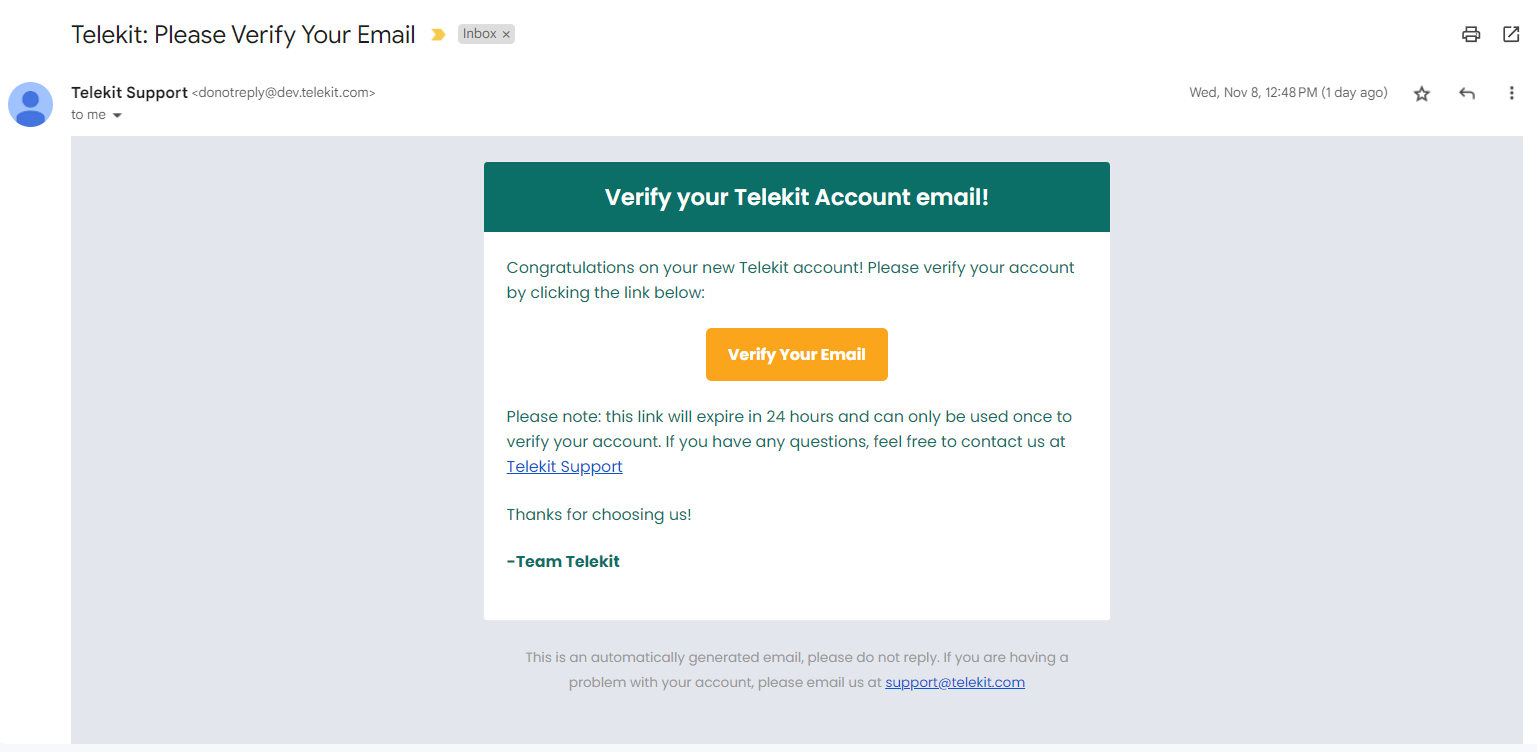
Telekit will automatically send a verification email to the email address provided during sign up. If you would like, you can resend the email verification by clicking on the link in the banner.
Head to your email and find the verification message below from Telekit. Click “Verify Your Email.” Once you're logged in, you are ready to go!
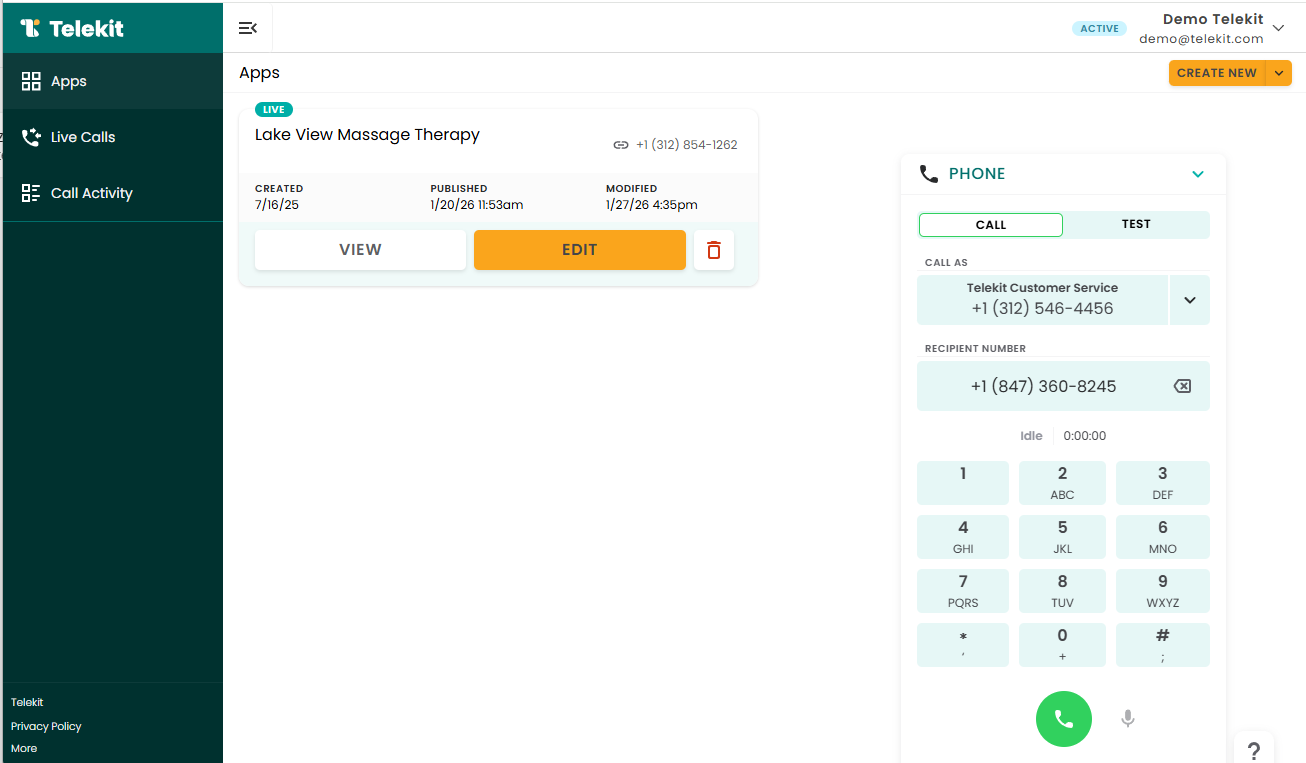
3. Create an App
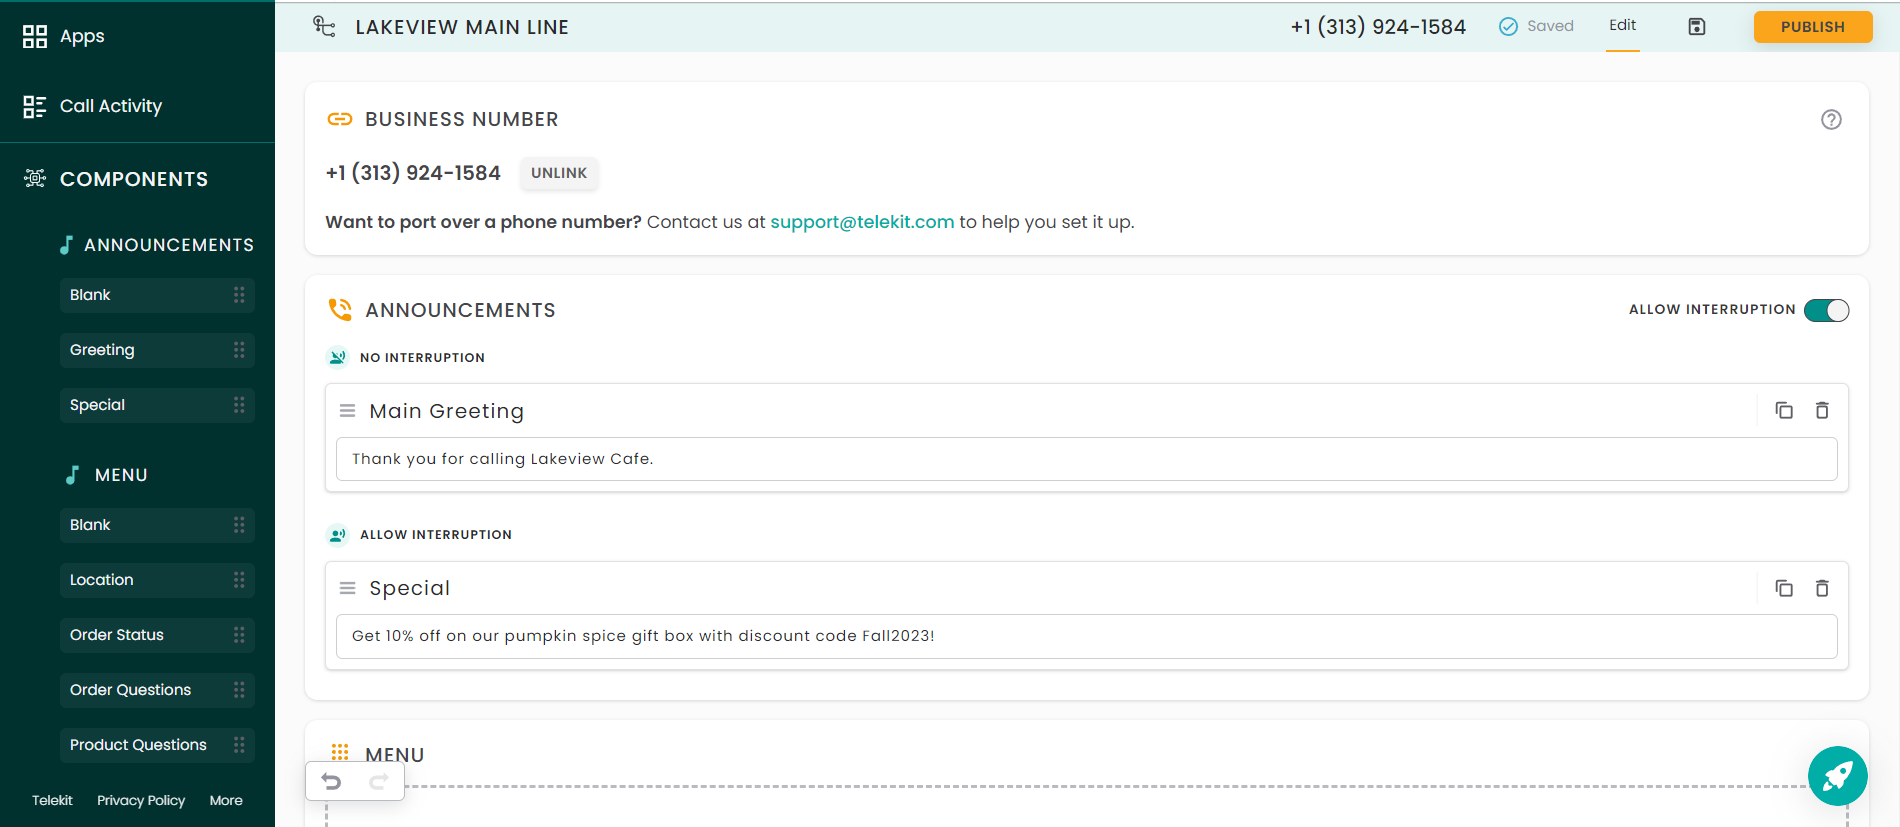
Click “Create New” and edit the application name. We’ve named this application “Lakeview Main Line.”

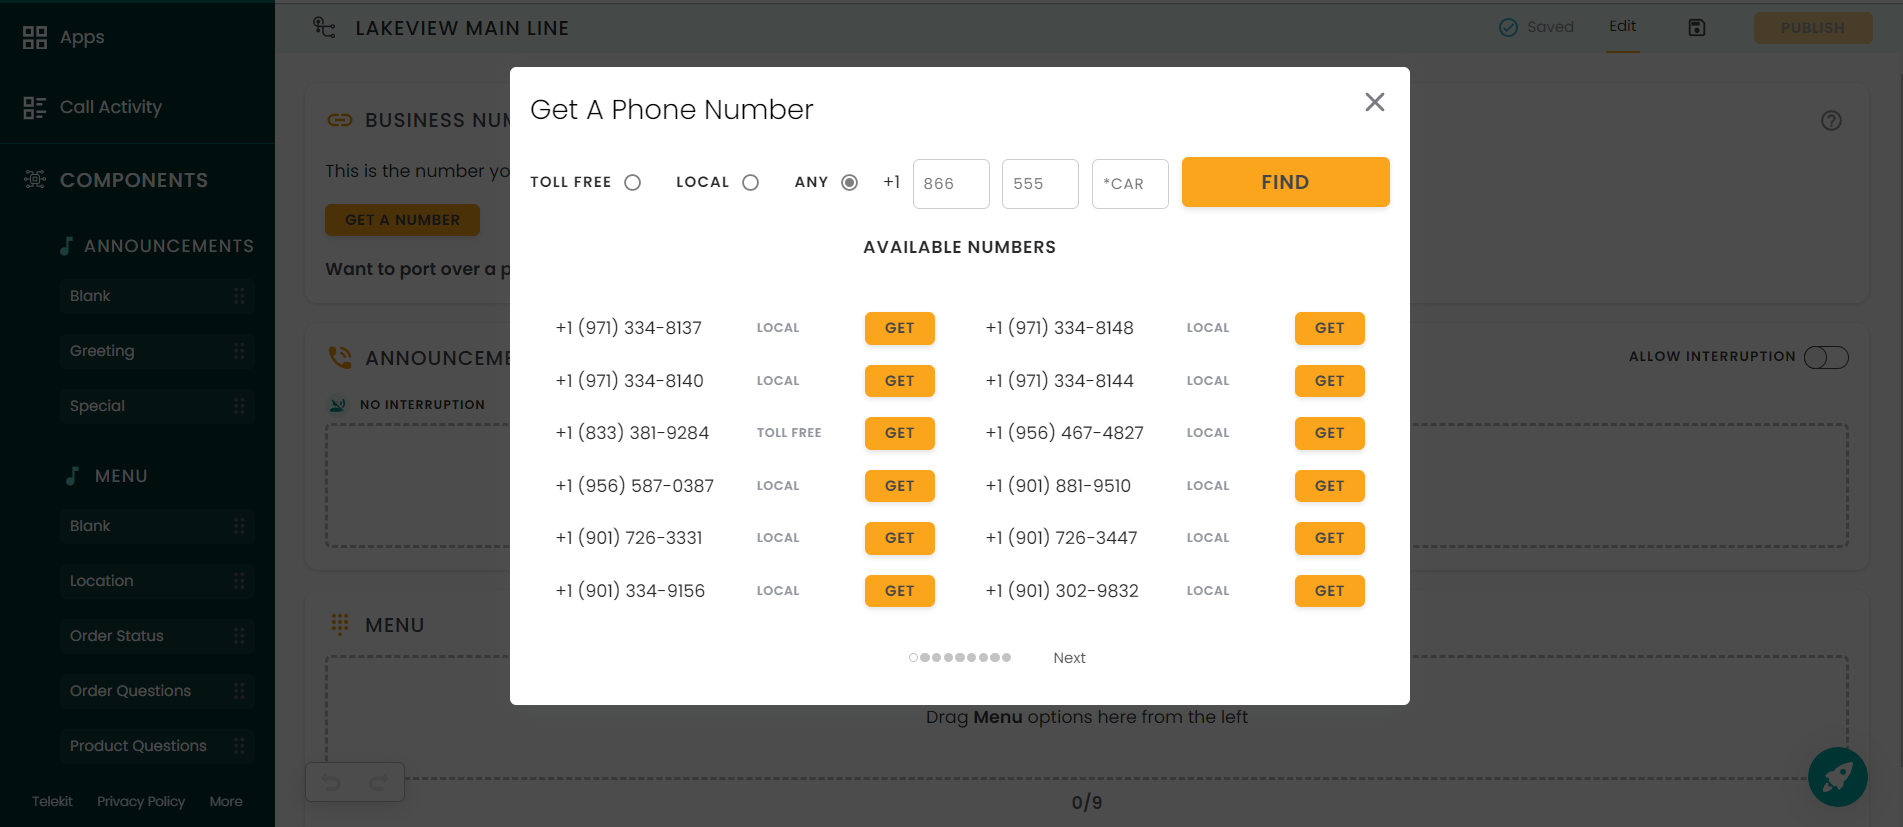
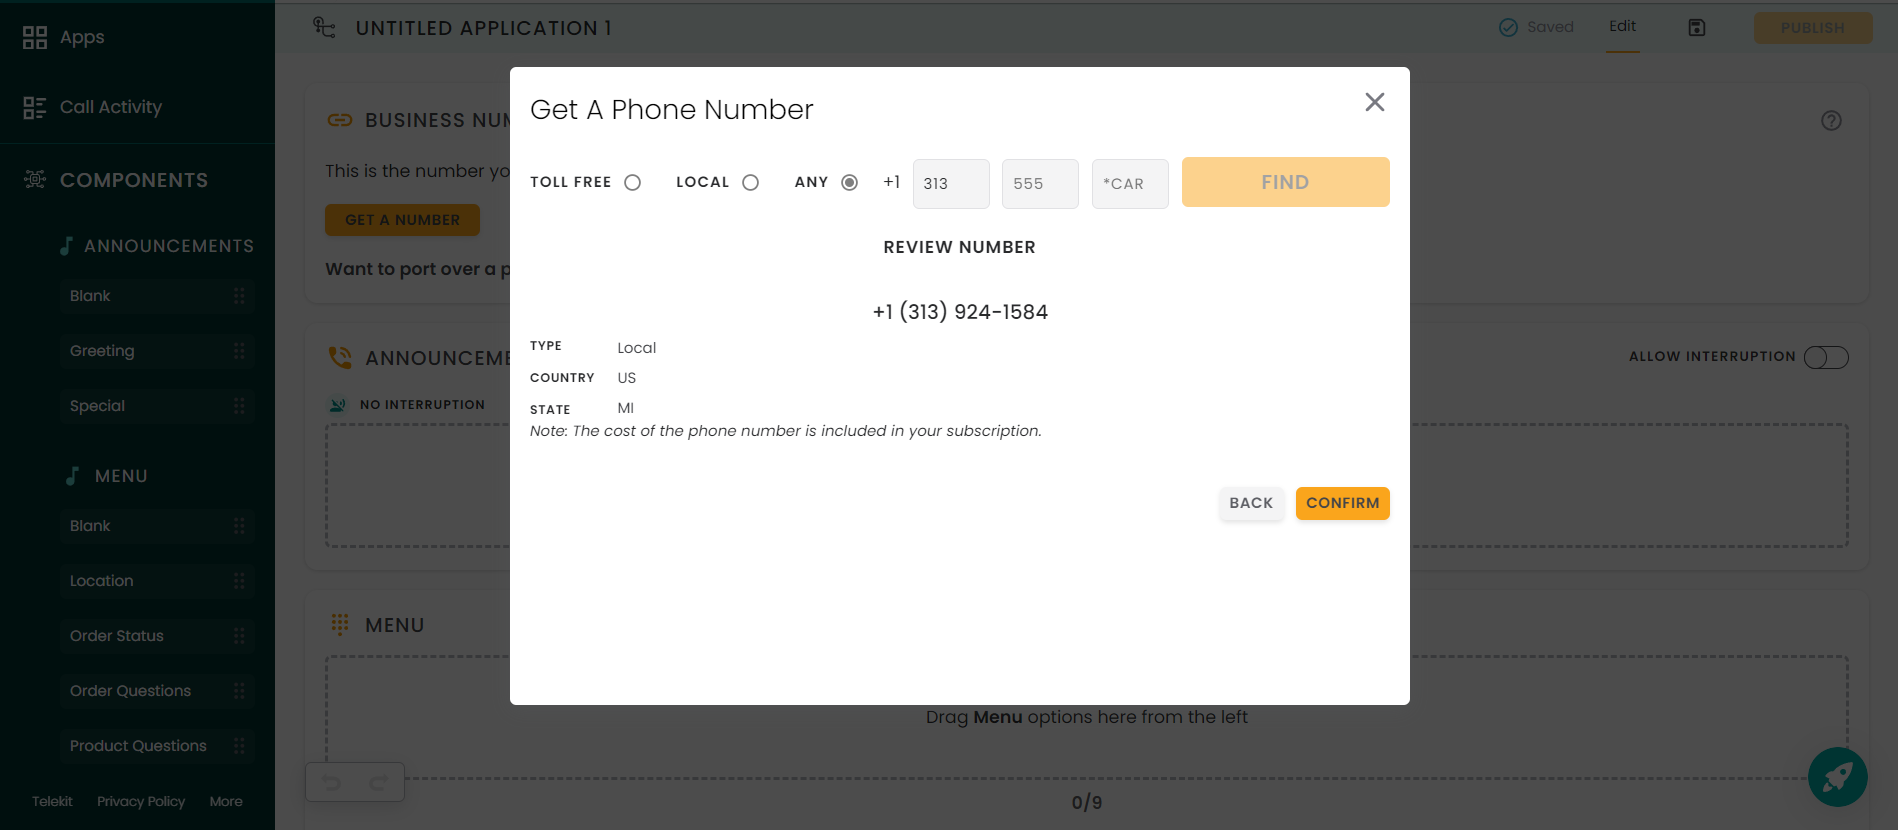
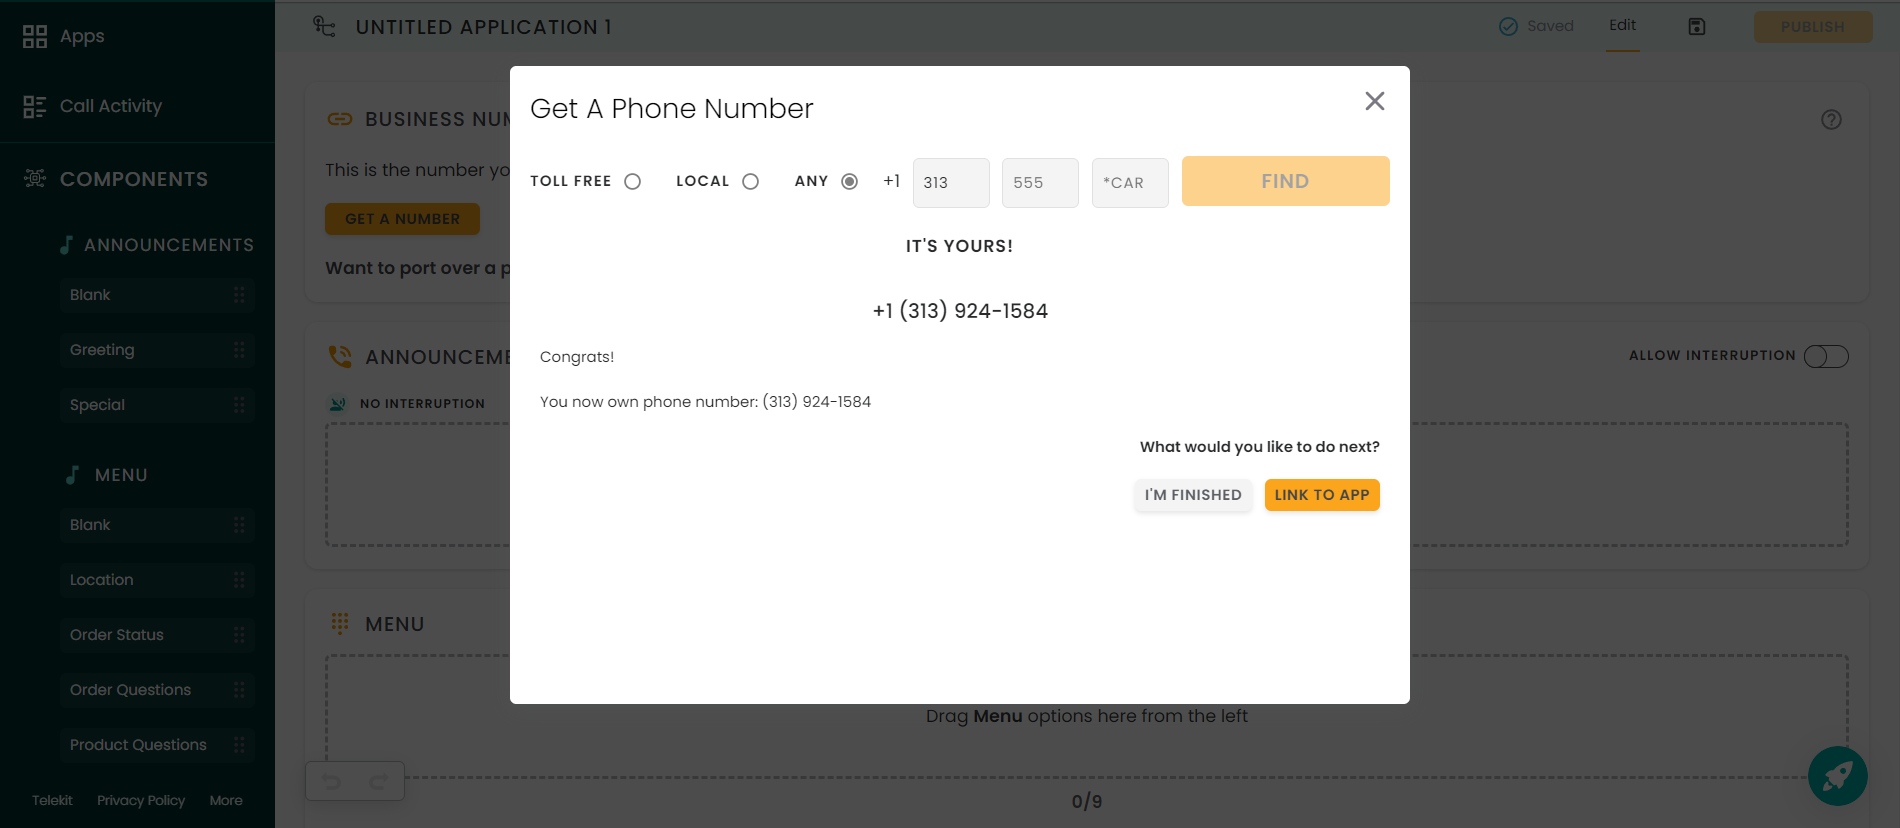
4. Get a Phone Number
Click “Get a Number,” select a phone number of your choice, and link it to your app. You can search and choose a local number for Chicago 312 or a Detroit number 313. You can also choose a toll-free number if you don’t want to be associated with a particular geographical region.
Note: Contact us to port over your existing business phone number
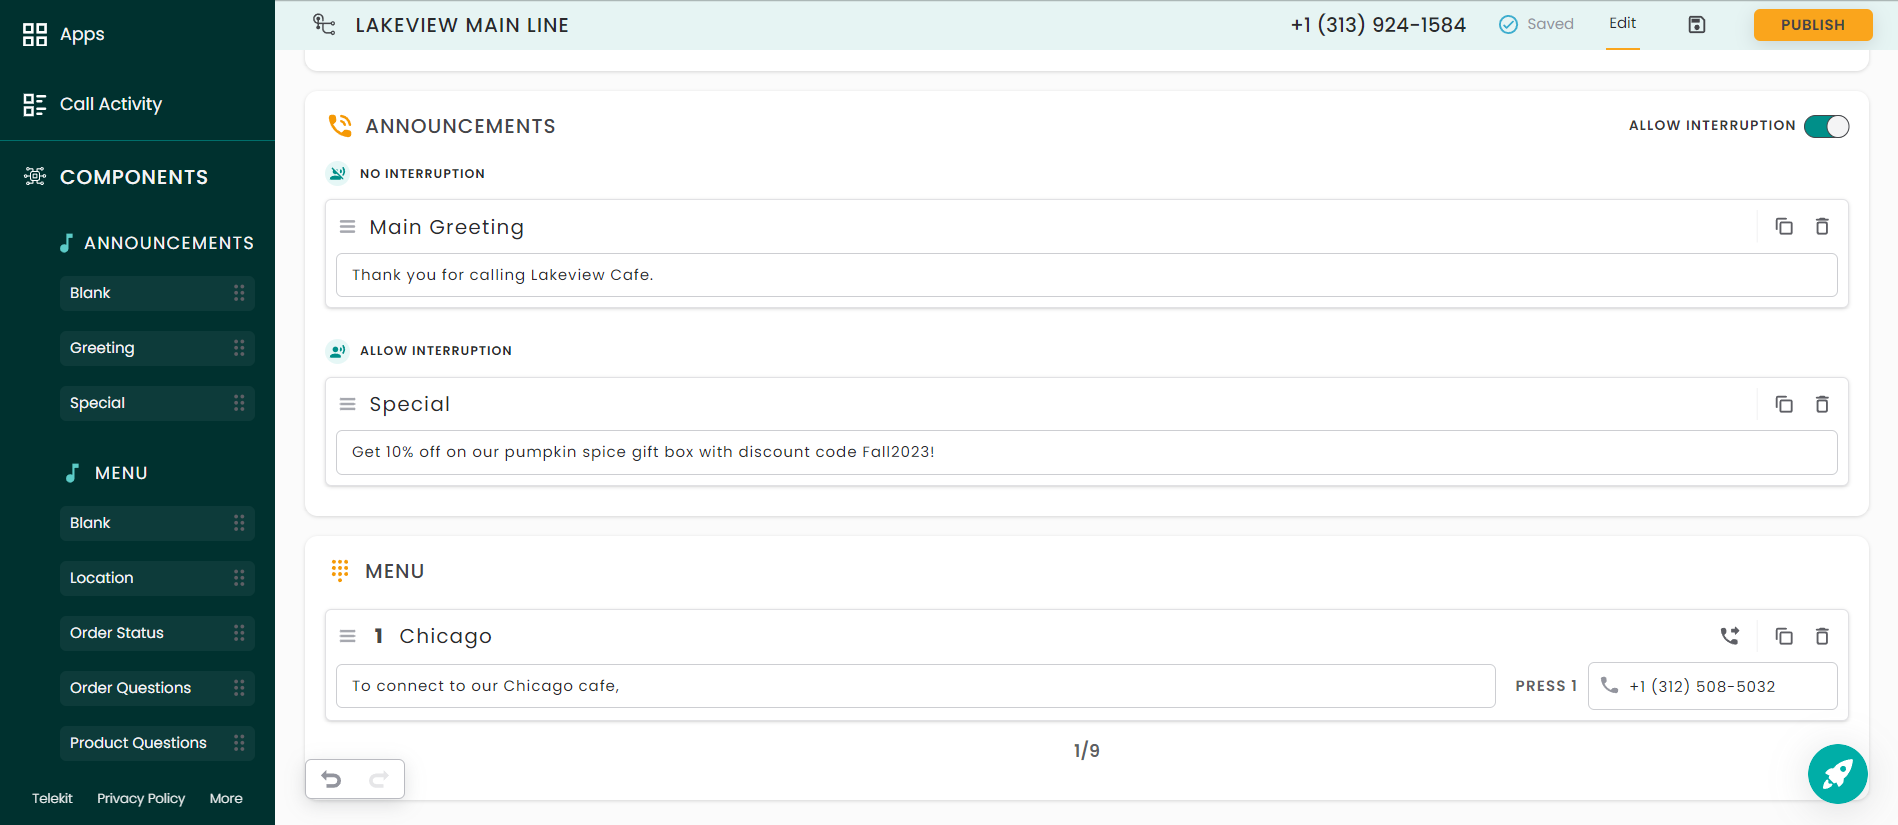
5. Set up your Announcements
- Drag and drop the “Greeting” option to your Announcements section.
- Click and edit the label’s name. Let's change this to “Main Greeting.”
- Click and edit the greeting to include your business/organization name. Let’s change this to “Thank you for calling Lakeview Cafe.”
- Activate the “Allow Interruptions” toggle. This allows you to include any special announcements that callers may want to skip. They can do so by pressing a key to select a menu option.
- Include any special announcements. Let’s drag and drop the “Special” option and edit it to say, “Get 10% off on our pumpkin-spice gift box with discount code Fall 2023!”
6. Set up your location menu options
- Drag and drop the “Location” option to your Menu section.
- Click and edit the label’s name. Let’s change this to “Chicago.”
- Click and edit the menu option to say “To connect to our Chicago cafe,”
- Add a transfer phone number to the “Enter Transfer Number” field. Let’s assume you have a landline set up for the cafe located in Chicago. Add that 10-digit phone number in this field.
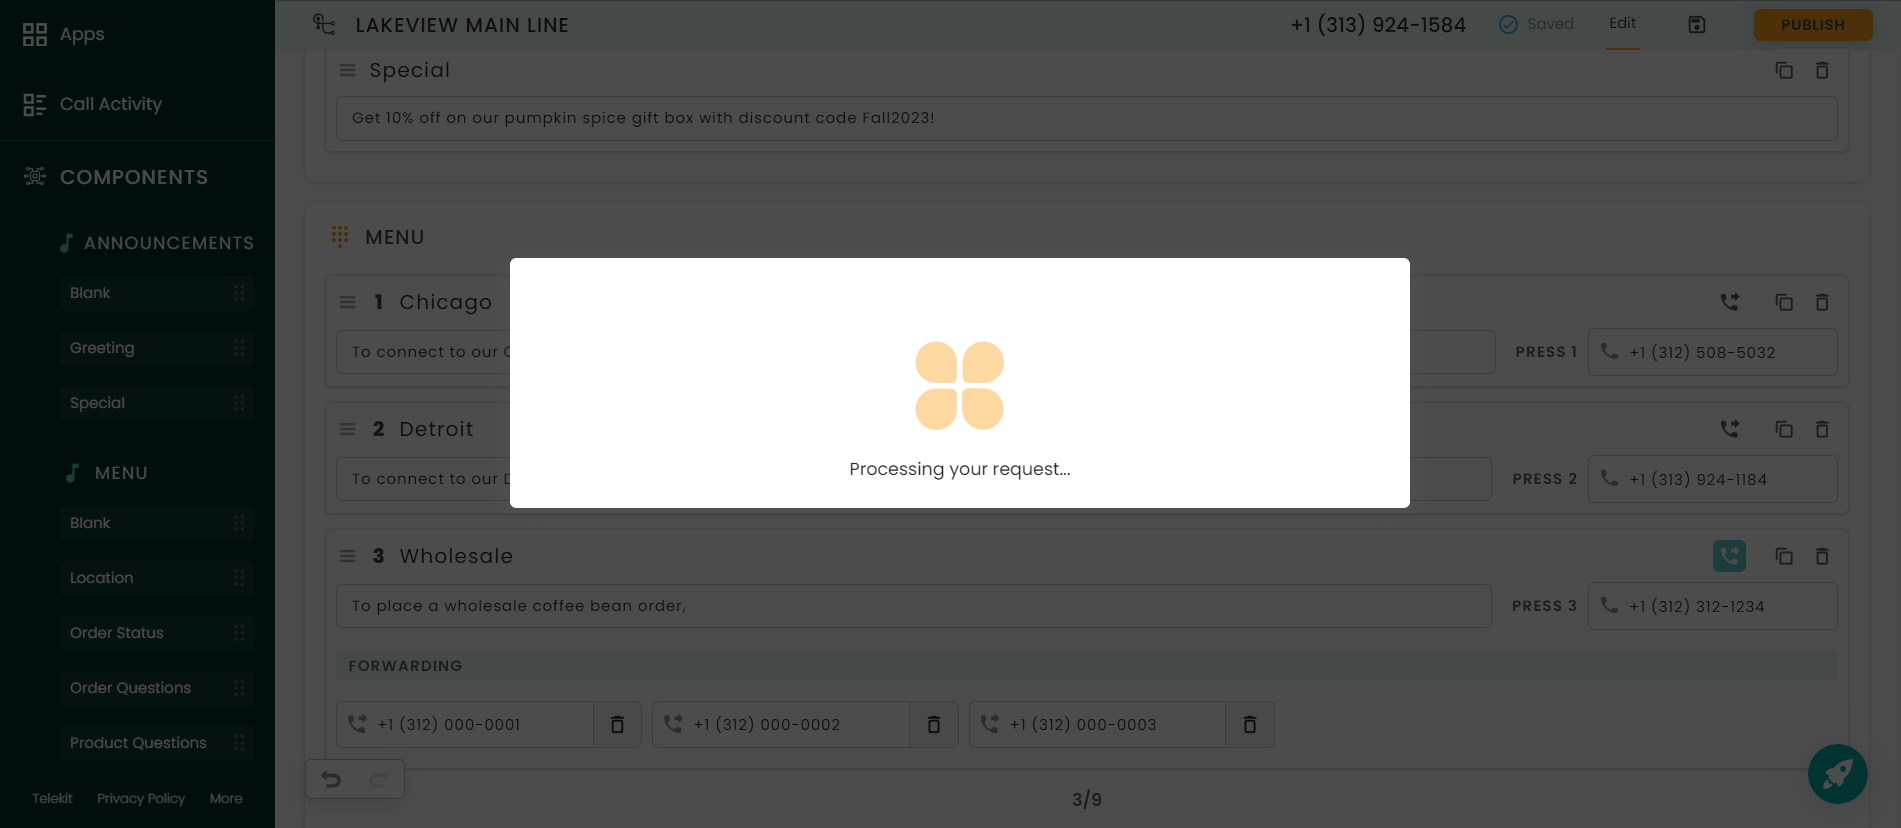
7. Add a second location menu option
- Click the “Duplicate” icon in the upper righthand corner of the label.
- Click to change the label’s name. Let’s change this to “Detroit.”
- Click and edit the menu option to say “To connect to our Detroit location,”
- Add a transfer phone number to the “Enter Transfer Number” field. Let’s assume you have another landline set up for the cafe located in Detroit. Add that 10-digit phone number in this field.

8. Set up your wholesale order menu option
- Drag and drop the menu option of your choice to the Menu section. All options under Menu are customizable.
- Click and edit the label’s name and change this to “Wholesale Order.”
- Click and edit the menu option to say, “To place a wholesale coffee bean order,”
- Add a transfer phone number to the “Enter Transfer Number” field. This could be your cellphone number, your business partner’s number, or your teammate’s number if you have an offsite roastery. For the purpose of this test application, use a friend’s phone number.
- (Optional) Activate the “Call Forwarding” menu option by clicking the Forwarding icon in the upper righthand corner of the label. If the transfer phone number does not answer, subsequent numbers will be called in the order listed until the call is answered.

9. Publish your application
Click the “Publish” button in the upper righthand corner of the screen. This will take 30 seconds or less.
Your application is now live!
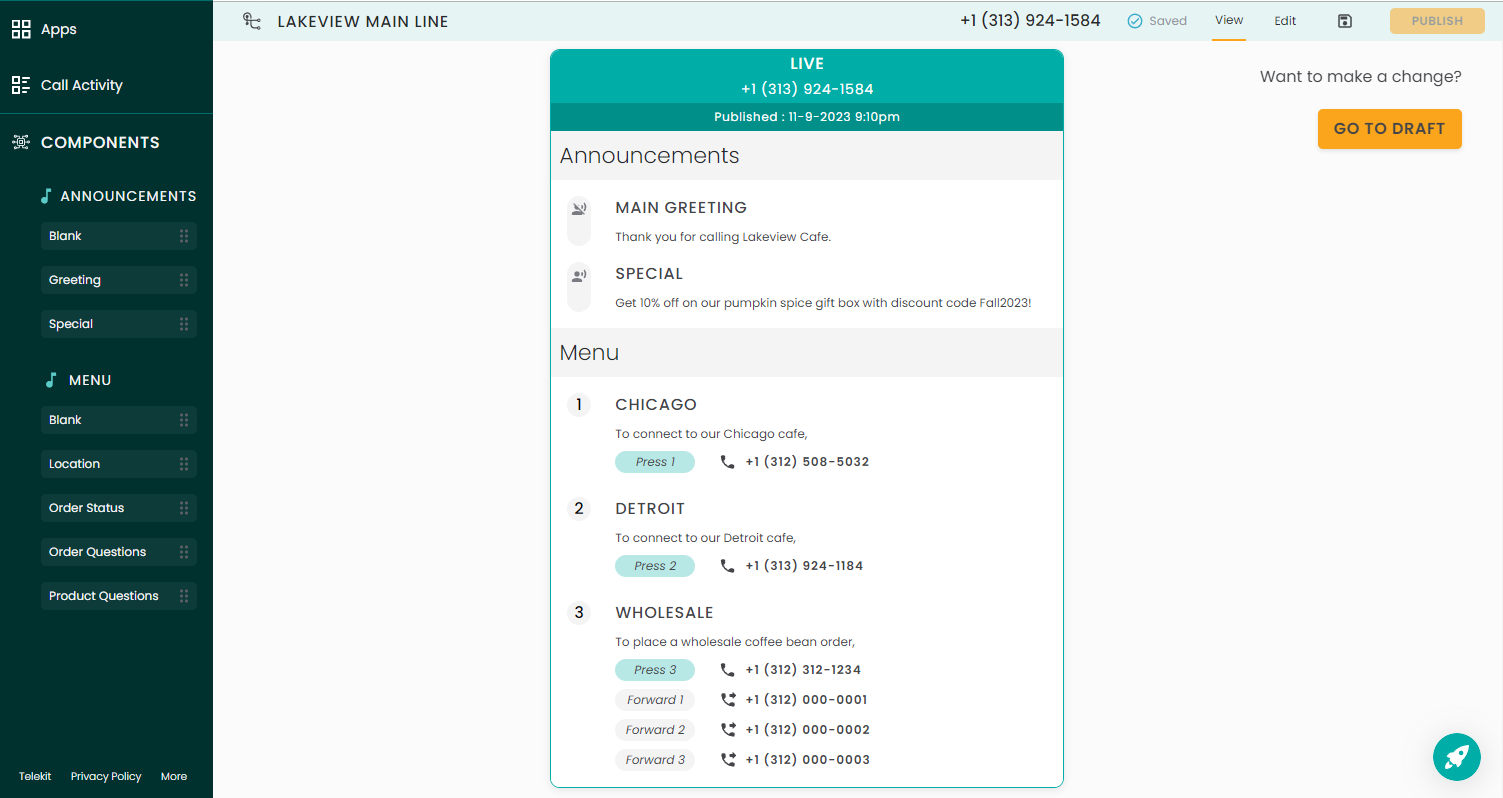
10. Test your app!
In this tutorial, the business phone number is 313-924-1854. However, to test your app, make a call into the phone number linked to the application you have created.
Congratulations on publishing your first Telekit application and making a test call!
If you have any questions or concerns and would like to reach out us, email us at support@telekit.com or call us at +1 (312) 546-4456